Melt & Pour Soap MakingEDITORIAL NOTE: THE FOLLOWING CREDIT MUST APPEAR UNDERNEATH THE TITLE OF THE ARTICLE This article is copyright ©2004-2026 by Natural Sourcing, LLC (www.fromnaturewithlove.com) and is reprinted with permission. Melt & pour soap making is a perfect method for beginners because it is much safer to make than the cold process method, and you are able to use the soaps that you make within hours instead of the weeks it takes for cold process soap to cure. With proper supervision, children may watch or even participate in some of the steps that are involved. The visual and artistic effects that can be created with melt and pour soaps is stunning. Melt and pour soaps can be made that contain multi-colored confetti soap pieces, soap colors can be swirled together to lend a marbled look, can contain soap pieces that you have cut into various shapes and can be layered to give a striped appearance. The effects that you create are endless. For ideas that go far beyond this introductory article, we recommend the book Melt & Mold Soap Crafting by C. Kaila Westerman. A melt and pour soap base is a premade soap base that is usually sold in 2 lb. blocks, with perforated lines that make it easy to divide the block into 1 ounce chunks. When making melt & pour soap, cut the desired amount of soap base into blocks and then melt them on the stove using a double boiler. The soap melts to become an easily pourable liquid that can be poured into a soap mold. Molds are available that make your soaps look like professionally molded bars complete with inset designs and patterns. Alternatively, melt and pour soap may be poured into any large mold and then hand cut for a more natural appearance. Essential oils and fragrance oils may be added for fragrance. Other additives such as nourishing vegetable oils, vegetable butters, colorants, herbs or clays may also be added for their nourishing or asthetic appeal.
Melt and pour soap bases are available in transparent colors and also in opaque and clear varieties. Soap bases with special nutritive additives are also available. Soap making supplier From Nature With Love, for instance, offers a large selection of specialty melt and pour soap bases such as aloe vera, avocado & cucumber, cocoa butter, goat's milk, green tea & hibiscus, hemp, honey, rosehip & jojoba, seaweed and shea butter.
It can be fun to experiment with combining two different soap bases to achieve different visual effects or to combine the nourishing properties of different bases. A popular combination, for instance, is to make a "Milk and Honey" soap by combining equal portions of honey soap base with goat's milk soap base.
Use a double boiler or use a double boiler insert that is big enough to hold all of the soap that you wish to melt. For melt and pour soap making, 2 lb. batches are very easy to work with and fit well into a small 2 quart double boiler. It is best to melt the soap slowly over medium-low to medium heat over a double boiler, stirring frequently. Try not to heat the soap for too long or heat it too quickly. Doing so can dry out the soap. Once all soap is melted, it can be taken off of the stove. If planning to fragrance your soap, it is best to transfer the soap into a bowl large enough to stir the soap without splashing. After transferring the soap to the bowl, plan to stir the soap often and to be able to work quickly to keep the soap from hardening too fast.
Colorants, herbs, butters and exfoliants can be added to your soap. The type of ingredient and its properties will determine the point in time that you add the ingredient to your soap base. Vegetable butters and vegetable oils can be added during the heating of the melt and pour soap base. Adding additional oil or butter will add greater moisturizing and nutritive properties to your final bars. A good rule of thumb is to use approximately 1-2 tbs. per pound of soap base. Color additives such as natural tinting herbs, mica powders, oxides and ultramarines and organic dyes can be combined with the melted soap while it is still heating in the double boiler. Be sure to check the color additive to make sure that it is suitable for inclusion in soap recipes. For natural tinting herbs, mica powders, herbs and ultramarines, it is best to start by using only 1/8 tsp. per pound of soap. A little colorant goes a long way. You can always add a dash more color if the mixture looks too light. For liquid dyes, stir as you add the dye drop by drop. If you are using a powdered organic dye, mix it with a little water first before adding it drop by drop to your soap. Avoid tinting your soap to a dark shade as darker soaps may discolor the skin. Herbs and exfoliants such as nut meals can be added to your soap base, but it is best to wait to add them until after adding fragrance. Otherwise, the herbs can sink to the bottom of your soap molds and create a layer of botanicals on the top of your soaps. Using too much can also cause this to occur. A good rule of thumb is to use 1-2 tsp. of herbs per pound of soap. Stir the herbs in well and continue to stir well up until you pour your soap into the molds. This will help to keep the herbs from settling. Adding fragrance to your soap will be discussed in the next section.
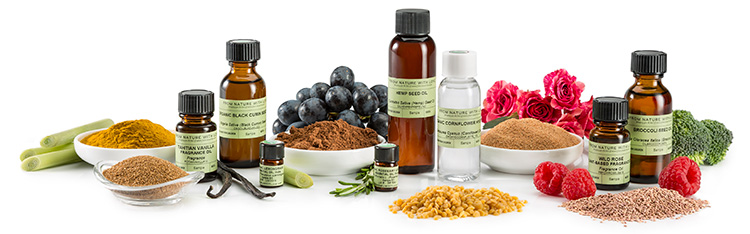
Before melting your soap or while it is melting, you can measure the essential oils or fragrance oils so that they are ready when it is time to blend them with your melted soap base. Avoid measuring your oils after you have removed the soap from the stove as the soap can cool quickly and make it hard to properly blend the oils with the soap, let alone pour the soap into the molds later. For consistent essential and fragrance oil measurements, it is best to use a gram scale. Set the small container that you wish to hold your oils onto your scale and then set the scale's tare feature so that it reads zero (so that the container is not weighed). Using a small pipette, dropper or the orifice reducer included in the bottle of oils, measure the oil into your container until the desired weight is reached. A good rule of thumb is to use 5 grams of essential oil or combination of essential oils per pound of soap. If using fragrance oils, the rule of thumb is 7 grams of fragrance oils or combination of fragrance oils per pound of soap. Most people stick with the use of just essential oils for a more natural soap or to just fragrance oils. If you do combine both essential oils and fragrance oils, start by using 6 grams of your combined oils per pound of soap. After you make your first batch of soap, you may adjust the amount of oils used based on the strength of the aroma. Some more potent essential oils such as peppermint will require less essential oil while other softer aromas such as cedarwood may require a bit more. It is very important to select oils that are not irritating to the skin and to not use too much oil as excessive oils can cause irritation in some individuals. Certain essential oils such as cinnamon, clove and black pepper can be irritating and should only be used in very tiny quantities, if at all. As mentioned within the Heating Melt & Pour Soap section, it is best to transfer the melted soap base to a bowl that is large enough to allow the soap to be stirred without splashing. After transfering the soap to the bowl, stir the soap until it firms up slightly, but try not to wait until it begins sticking to the sides of the bowl. The reason for letting it cool a little is because the excess heat of the soap can cause your oils to evaporate too quickly, making the soaps less aromatic. Once the soap has cooled slightly and while still stirring, add your essential or fragrance oils to the soap base and continue to stir it well. Be aware that adding these room temperature oils will cause your soap to cool more rapidly, so plan to work quickly and plan to add your soap base to the molds promptly.
Most plastic soap molds contain 4-6 soap cavities, and each cavity generally produces a 3-4 oz. bar of soap. The first time you use a new mold, it may take some experimentation to know how much soap base and other additives is needed to make the number of desired soaps. After you have fragranced your soap, pour the soap base into a container that contains a small spout. A glass measuring cup works well for pouring soap into the molds and is easy to clean up. It is best to try and quickly work as you pour the soap into your molds so that the soap does not cool off too much and stick to the sides of your pouring container. Once you pour your soap into the molds, you will often see small air bubbles form on the top of the soap. These air bubbles will remain in the soap as it dries. Fill a small spray bottle with alcohol (rubbing alcohol will work fine for this purpose). As soon as you've poured your soaps into the molds, lightly spray the top of the still liquid soap with the alcohol to eliminate the air bubbles. EDITORIAL NOTE: THE FOLLOWING CREDIT MUST APPEAR AT THE BOTTOM OF THE ARTICLE FromNatureWithLove.com offers all of the melt and pour soap bases, ingredients and packaging supplies described within this article. For more information, please visit www.fromnaturewithlove.com. This article is copyright ©2004-2026 by Natural Sourcing, LLC and is reprinted with permission. This article may be reprinted provided that all credit information remains intact.
|
Do You Have Product Questions?
Our goal is to empower every customer with the knowledge needed to make informed and confident product decisions.


Clicking the button above should open your email application.
If it doesn’t, you can reach us directly at productsupport@fromnaturewithlove.com.


“I am completely thrilled with the service and product that I have received from your company.”
LynnMarie Whitt, Newark, DE